Hokey Pokey Ice CreamThis ice cream looks complicated; but in fact it's really simple, you just have to make the different components in different stages. As heat is the enemy to ice cream, it's best to make the custard and toffee sauce the night before. Make the honeycomb on the day as it has a tendency to go soggy and start to dissolve. 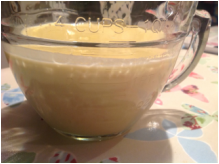 For the Ice Cream Custard
1. Beat the egg yolks and sugar together in a bowl until they become pale and slightly thicker. 2. Heat the milk and cream together in a saucepan, until tiny bubbles appear. Don't let it boil. 3. Remove the hot milk from the stove and pour through a sieve onto the eggs. Use a spoon to mix them, don't be tempted to use an electric whisk like I did. It creates a very frothy custard that is a nightmare to cook. 4. Return the custard to the pan and heat again for approximately 10 minutes, until it has thickened and coats the back of a spoon. 5. Make sure you keep stirring to avoid lumps; but don't worry if you do. There's a secret cheat - if you get into difficulties you can use a handheld liquidiser. It works a treat and no one ever knows. 6. Pour the custard into a jug and leave to cool, then place it in the fridge overnight.  Toffee Sauce
1. Place the sugar, butter and cream into a small saucepan and heat gently. Keep stirring until the sugar and butter have melted, about 10 minutes. 2. Remove from the heat and add the pinch of salt, to taste. 3. Pour the sauce into a bowl to cool, then place it in the fridge overnight. 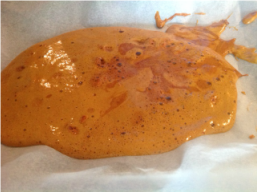 Honeycomb - I used Nigella's Recipe. Make the honeycomb just before you're ready to make the ice cream.
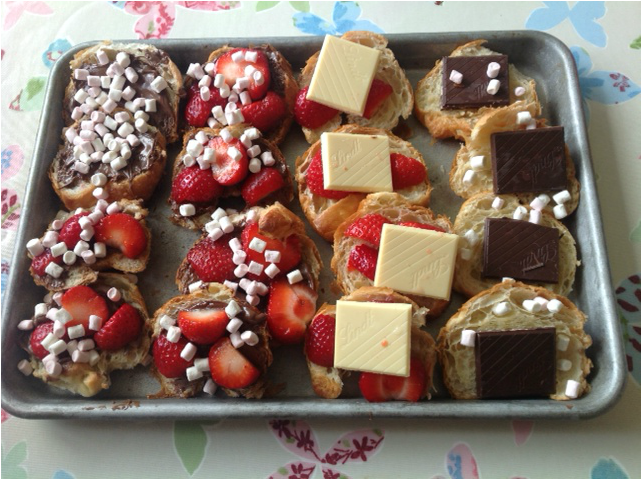
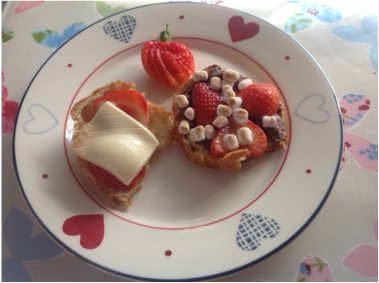
1. Line a baking tray with grease proof paper - this is a must first step. 2. Place the sugar and syrup in a large, heavy based pan. It needs to be large because when you add the bicarb it will froth up and it's a little scary! 3. Mix the sugar and syrup together with a spoon, until well combined and then heat it on a low heat - WITHOUT stirring! 4. Once the sugar looks like it has dissolved, you can increase the heat and allow it to boil for about three minutes, until you get a maple syrup colour. I found this tricky, not wanting it to be too pale or, worse still burn the sugar. I decided under was better than over done. 5. Remove the sugar from the heat and with your whisk ready, add the bicarbonate of soda. It will bubble up, so you'll be pleased you have the large pan. Stir it quickly to mix it all together. 6. Immediately pour the bubbling mass out onto your baking tray. It will already be cooling and hardening. Work quickly so that you get as much of it out on the tray and not stuck to the sides of the pan. 7. Don't be tempted to spread the honeycomb out into a smooth layer or you will lose all those lovely air bubbles that make the honeycomb. 8. Leave to cool; but this only takes about 15 minutes. Hokey Pokey Ice Cream 1. Place the chilled custard into an ice cream machine and churn for 20 minutes. 2. Add the majority of the toffee sauce, reserving a couple of tablespoons for serving. Churn for 10 minutes or until the ice cream is nearly set. 3. Using a rolling pin, break up the honeycomb into small pieces, nothing too big that people might break a tooth on - this isn't really a denture friendly recipe. 4. Add the honeycomb to the recipe, again reserving a few larger pieces for serving. 5. Churn the ice cream until it's set then remove from the machine and serve immediately, with the extra sauce and honeycomb on top. You can transfer any extra ice cream into a pot and freeze for later. 6. Enjoy! Today I went to my friend's Pizza Party and she asked me to bring dessert. I thought about whipping out my Gluten Free Nutella Meringue Brownies then I realised we had a pack of croissants left over from a family visit. I thought I'd try to find a way to use them up. I turned to trusty Google - I hardly ever use recipe books anymore. The only recipe I came up with was a bread and butter type pudding. It sounded amazing; but it would take far too long to cook at the party. I decided to create my own recipe and so my Sweet Pizzas were born! They're the easiest thing and you can put anything you want on them. I raided my cupboards and found a pack of mini marshmallows and some bars of chocolate. They work as a very yummy dessert; but I also tried one out for breakfast and it made for a very indulgent start to the morning - much more exciting than a croissant with a dollop of jam, even if it is homemade.
|

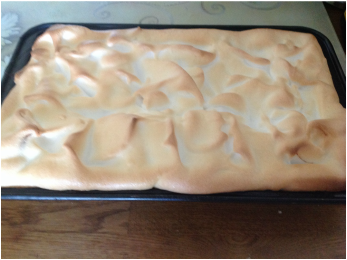
| Just to prove that I really am trying to cut down on gluten, here is a delicious recipe I tried last weekend for Gluten Free Nutella Meringue Brownies. When I first decided to alter my diet, I did not have high hopes for cakes. In fact I thought cakes were off the menu; but I've been pleasantly surprised. I like the Marks and Spencer's Gluten Free Flour, it seems to work just as well as normal flour and I haven't noticed much of a difference in taste or perfromance. |
These Gluten Free Nutella Meringue Brownies were incredibly easy to make and tasted delicious. In fact I've had several requests for the recipe, so I thought I had to share.
I did mean to take a picture of them cut up into pretty squares; but they were so good that they disappeared too quickly.
I hope you enjoy them as much as we did!
I did mean to take a picture of them cut up into pretty squares; but they were so good that they disappeared too quickly.
I hope you enjoy them as much as we did!
Despite my many postings about cake, I am trying to cut down on the amount of gluten and sugar I have. Just ignore all the pictures of cakes - they're for sharing. Really.
It can be a nightmare finding the right ingredients for some of the gluten free recipes. And who knew how many things contain gluten?! It's a minefield and I'm only cutting down. I feel so sorry for all my friends who have Coeliac Disease and have to be so careful.
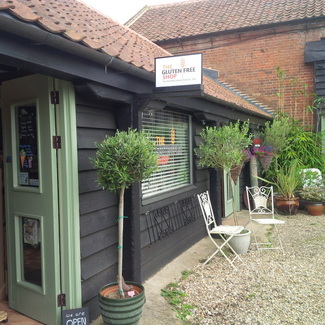
That's why I was delighted to discover a new shop Norfolk Gluten Free at Hellesdon Barns, just outside Norwich. They sell a huge array of gluten free food and ingredients - everything from flour to bread, cakes to crisps. Even pies, pasties, ice cream cones and Mississippi Mud Pie! I resisted that though... Well this time at least.
It can be a nightmare finding the right ingredients for some of the gluten free recipes. And who knew how many things contain gluten?! It's a minefield and I'm only cutting down. I feel so sorry for all my friends who have Coeliac Disease and have to be so careful.
That's why I was delighted to discover a new shop Norfolk Gluten Free at Hellesdon Barns, just outside Norwich. They sell a huge array of gluten free food and ingredients - everything from flour to bread, cakes to crisps. Even pies, pasties, ice cream cones and Mississippi Mud Pie! I resisted that though... Well this time at least.
| Their flour dispenser was a sight to behold. I've never seen anything like it. So many different types of gluten free flour and you could measure it out to make up your own blends. I've seen a lot of recipes that require special flours; but not wanted to buy a big bag. I bought coconut flour and was hugely disappointed. I was expecting it to be something out of a Bounty advert; but I hated the texture. This way you can try one recipe, see how you get on and go from there. I'm really looking forward to going back, armed with a long list and a few recipes waiting at home. | 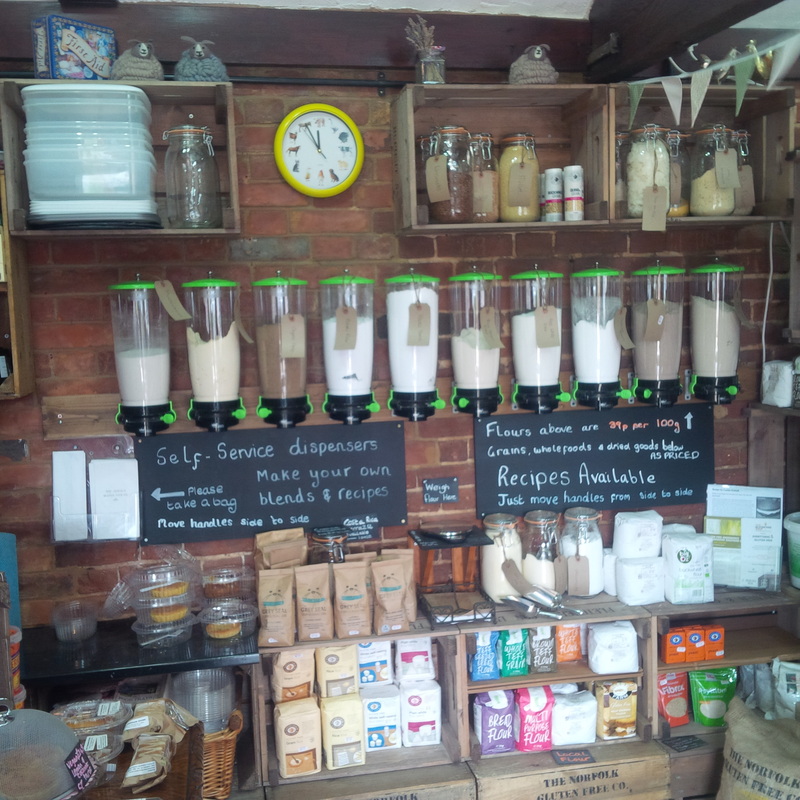
|
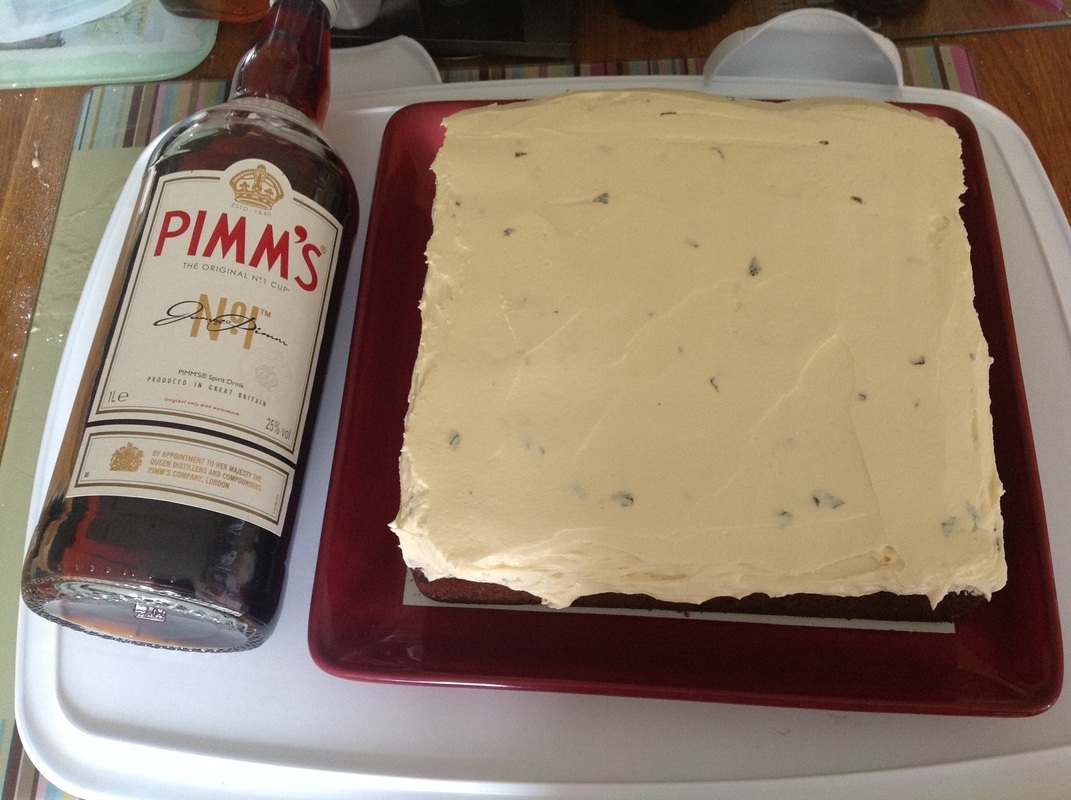
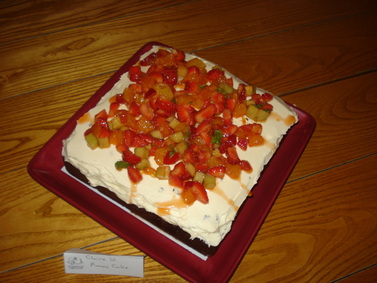
| This week was my monthly Clandestine Cake Club which meant it was time to find a new recipe to try. I'd chosen the theme of Boozy Bakes because we were meeting at the Unthank Arms, a pub in Norwich. It was a little bizarre really, because I don't drink. Not for any specific reason other than I don't like the taste and I figure my body has enough to deal with, with the ME, without me adding more things for it to fight. I spotted this recipe for a Pimms Cake in the Sainbury's Magazine. Pimms is about the only alcohol I do drink, probably because it's light, fruity and I water it down with a lot of lemonade. |
The cake turned out to be really easy and very yummy - I skipped the meringue buttercream. Frankly it's a lot of faff and I don't think it tastes any better than the normal butter icing I make. It went down really well and was very refreshing on the warm summer evening.
The rest of the cakes at the Club were delicious - I couldn't pick a favourite; but I really enjoyed the ginger beer and rhubarb cake, the pina colada cake and both the chocolate and stout/Guiness cakes.
Now I'm craving cake again....
Now I'm craving cake again....
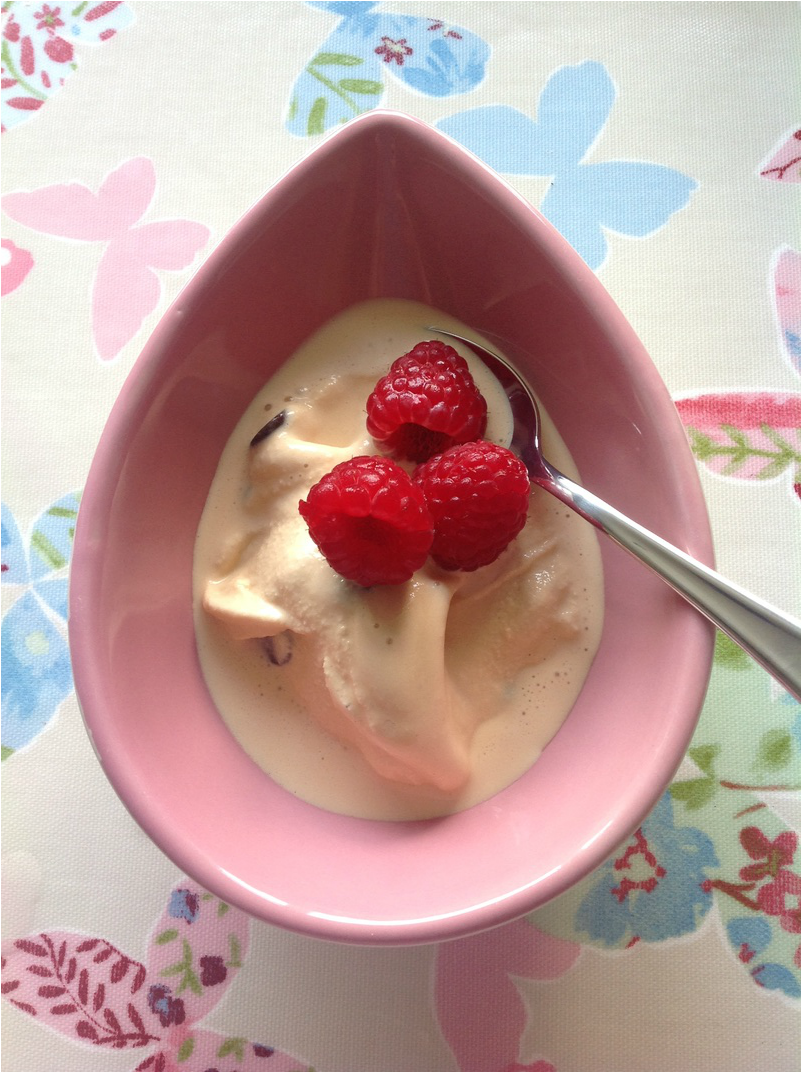
| My goodness it's hot! Too hot; but at least it's an excuse to eat ice cream. Ice cream is one of the joys of summer; but since I'm trying to go dairy free, I've really missed the yummy, cool treat. I even treated myself to a very lovely ice cream machine last year and thought it was going to go unused. I was wrong. I've been Googling dairy free ice cream recipes (without banana because I can't stand the fruit). There were a lot that came up; but most needed a homemade custard and right now I don't have the energy. It needs to be nice and easy or not at all. That's when I stumbled upon a recipe in the Sainsbury's magazine for Salted Caramel and Chocolate Ice cream, it looked really quick and easy - perfect! I thought I'd have a go; but to make it dairy free, I decided to substitute the cream for coconut milk. It was a bit nerve racking as it's not something I've tried before. Turns out I had nothing to worry about. It was delicious, you have to try it. Don't worry if you don't have an ice cream machine, you can also do this in the freezer overnight. |
Easy Salted Caramel and Coconut Ice Cream
- 1 can Carnation Caramel
- 1 can Coconut Milk (normal, not light)
- pinch of salt
- chocolate chips (personally I wouldn't use these again)
- Chill the cans before using - your ice cream will freeze quicker.
- Mix the caramel, coconut milk and salt together. Add the chocolate chips if using; but I found they got really hard and weren't pleasant, so personally I'd say leave them out then sprinkle a few on at the end if you feel the need.
- Either pour into your ice cream machine and follow your usual instructions. Or pour it into a Tupperware pot and freeze overnight.
- If you make it in the freezer, take it out 15 minutes before serving. If you're lucky enough to have an ice cream machine you can eat it straight away and freeze any leftovers in a Tupperware pot.
- I served mine with raspberries, the slight tang balanced the gorgeous sweet creaminess. Yum!
Do you have any dairy free ice cream recipes you think I need to try?
 | When people complement me on my baking I always feel a bit of a fraud. Not because I buy the cakes, promise; but because it's not difficult. In fact baking is really easy once you learn the basic rules. I always enjoyed science at school and baking is chemistry, you take a set of ingredients, follow the method and ta-dah, the result is cake. Yes the hardest part is knowing if it's done; but that's just practise. My go to cake recipe is the one my Mum taught me and her Mum taught her. I like to think of it as my Football Cake because then the recipe is easy to remember, it's basically 4-4-2 like the football formation. Here goes... |
Sponge Cake - aka Football Cake
- 4 oz butter, softened (left out of the fridge overnight)
- 4 oz caster sugar
- 4 oz self-raising flour
- 2 eggs, beaten
- 1 tsp vanilla extract
Method
You can throw all the ingredients into a food processor or electric mixer and beat them together - this gives a classic Victoria Sponge with a denser, firmer texture that my Mum loves. Personally I prefer the creaming method because I think it gives a lighter texture.
- Preheat the oven to 180C.
- Beat the butter and sugar together. See Top Tips.
- Once the mixture looks a lighter texture and colour (about three minutes) you can slowly add the eggs a teaspoon at a time. I alternate this with a spoonful of flour, so the batter doesn't curdle.
- Keep alternating until all the eggs have been incorporated, then add the vanilla extract and the rest of the flour. I use the electric mix the whole time; but on a slow speed.
- Pour the batter into a non-stick loose bottomed tin. I prefer one with high sides as you won't stick your finger into the cake accidentally when you're turning it or taking it out of the oven.
- Put it in the oven on the middle shelf. Bake for 15 - 20 minutes, depending on your oven. Mine cooks more on one side than the over, so the cake has to be turned regularly after the first ten minutes. I know some people say never open the oven on a sponge; but I've never had a problem. Just work quickly, turn the tin a quarter turn, without banging or knocking it and then shut the door carefully so that you don't jar it and force the air out of the cake.
- To test if the cake is done - it should look golden all over and smell good. Press your little finger lightly to the top of the cake and it should spring back immediately after you remove your finger. Then use a skewer, insert it into the cake and see if it comes out clean - completely clean, not remotely gooey; but maybe with a few crumbs stuck to it. See Top Tips for more help in testing the cake.
- Leave to cool for 5 - 10 minutes; but remove the cake from the tin before it's completely cold. I stand the cake tin on a can of beans and slide the tin down off the cake. If it's stuck, carefully run a blunt knife or a plastic spatula around the tin. Do not cut or scrape the non-stick surface though.
- Now you can eat the cake as it is, cut it in half and add jam and butter cream, ice it or dust some icing sugar over. The choice is yours. Either way it will taste delicious and won't last long. Enjoy!
Top Tips
- This recipe can be scaled up and down. As it stands it serves about six people a small/medium sized slice. For a more generous serving I would double the recipe.
- To get a light sponge you really need an electric mixer. It can be done by hand; but you'll have to work really hard to get the right texture and I've never had the energy to even try. It's my dream to own a Pink Kitchen Aide. Until then I use Mum's Kenwood mixer, she got it as a wedding present and it's still going strong. The great thing is that it sits on a stand, so I don't have to hold it and saves my energy.
- I always use salted butter. I know a lot of bakers don't like it in cakes; but I like the balance of the sweet and slight salt. It tastes like real old fashioned butter does. I also don't use expensive butter when I bake. The basic butter works fine and tastes great.
- I think a cake gets heavier when it's done; but I have no idea why.
- The cake also sounds different, it can sound a little wet when you press the top if the centre is undercooked. Just put it back for a few minutes and try again. The wet sound goes away when it's done.
- If the cake is almost done; but it's starting to go too brown on top, cover it with foil.
- Keep checking the cake in the final minutes. Set a timer because you will get distracted and forget - I always do I get absorbed in something and then get upset I've wasted all that time.
- Saying that cake is easy to salvage - cut off the burnt bits and cover it in icing. Serve it with sliced with fruit and ice cream. Make it into a trifle. Or crumble it up and mix it with buttercream to make cake pops. Cake never has to go to waste, you just have to get a little creative.
- To ring the changes you can alter the cake for a different flavour.
- Chocolate - take out an ounce of flour and replace it with cocoa.
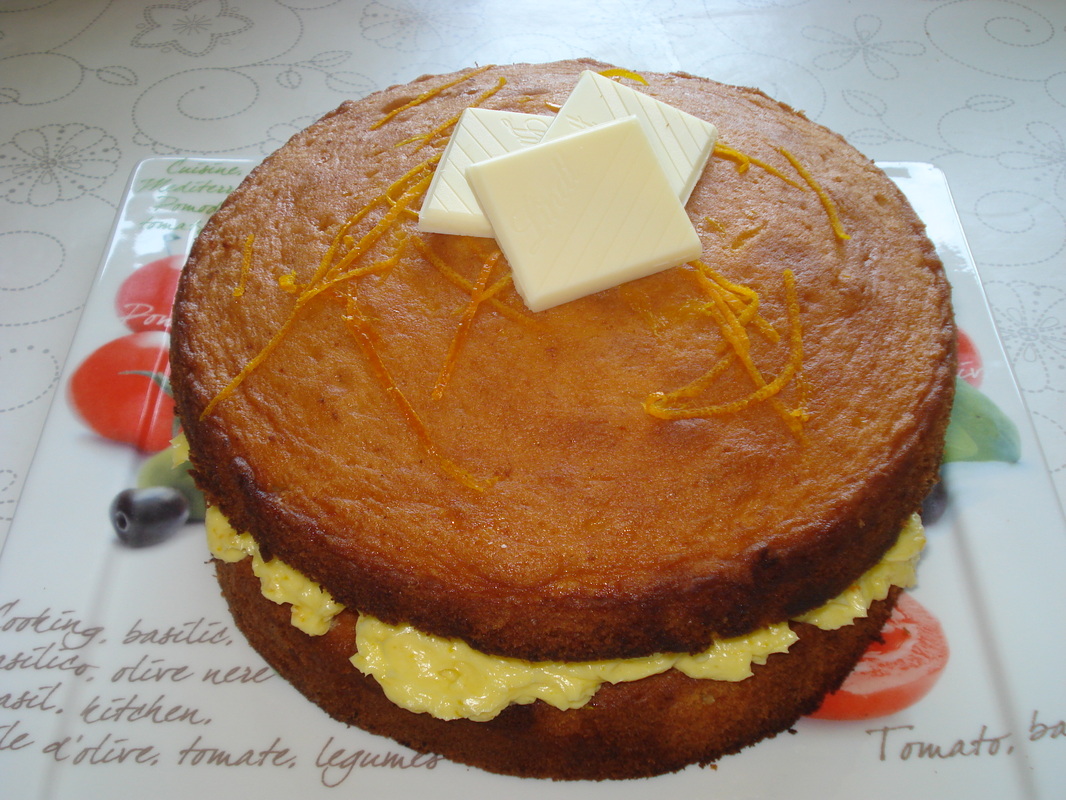
- Lemon, Orange or Lime - add the zest of a citrus fruit to the batter when you add the vanilla extract.
- Add an ounce of chocolate chips, dried fruit, chopped stem ginger or cherries.
- Honey - I've also switched the sugar for honey and this gives the cake a light, floral scent and lovely taste.

It's official, I've just taken over running the Norwich branch of the Clandestine Cake Club. It's typical me, I join a club and within a year I end up being one of the organisers. I always get really passionate and involved with the things I love to do. If you don't know about the Clandestine Cake Club, you can read more here...
It's been a little scary having to find venues that will host the events; but I've managed to sort most of the rest of this year out. Some are places I know and love, a couple I haven't been to before and I'm looking forward to visiting.
The hardest part of organising the events is the Clandestine part of the club - turns out I don't like keeping secrets, subterfuge is not my strong point. I am doing my best though.
My first event is later this month and the venue is really unusual, I can't wait to reveal it to the members who go. It was touch and go whether it would all come together in time for June and as such the theme is Surprise Cakes.
I'm not sure what I'll be doing. It can be a surprise ingredient, or one of those cool hidden cakes - though they look incredibly complicated. I think that might be too much of a challenge. Have you ever tried making one? What did you do and how easy was it?
I've been fancying trying one of the giant Jaffa Cakes, with the surprise being the layer of orange jelly. I'm going to turn to trusty Google for some other ideas. If you were making a Surprise Cake, what would you bake?

Shrove Tuesday may be my second favourite holiday, after Christmas of course. I love, love pancakes and the fact that they just use up store cupboard ingredients is the best part. I don't just have them on Pancake Day, in fact it's one of my Birthday traditions that someone cooks me pancakes for my breakfast, normally served with Ben and Jerry's ice cream - it is only once a year after all!
There are so many different recipes for pancakes; but this one is my Mum's and in truth probably my Grandma's and Great Nana's too. It's beyond easy. We make ours up a few hours before, last night in fact so that it can rest and was ready for breakfast pancakes - with lemon and sugar of course!
There are so many different recipes for pancakes; but this one is my Mum's and in truth probably my Grandma's and Great Nana's too. It's beyond easy. We make ours up a few hours before, last night in fact so that it can rest and was ready for breakfast pancakes - with lemon and sugar of course!
Basic Pancakes
This is in old school metric, it's that old! It's also for the British style of pancakes, the American ones are yummy; but just aren't the same.
- 8 oz plain flour
- 1 pint milk (we use UHT pasteurised aka long life, because the batter lasts overnight)
- 2 eggs
- pinch of salt
Butter to fry
Topping of choice

- Mix all the ingredients up in a jug or bowl, then cover and leave to rest.
- When you're ready melt a small knob of butter, about a quarter of a teaspoon in a non-stick pan. That's the secret to being able to flip them easily.
- Give the batter a final whisk then spoon into the pan, using a large serving spoon or ladle is best. I love my pancakes thin and crispy like crepes; but Mum does them thick and chewy. Vary the amount of batter you use - it's trial and error to get the perfect pancake for you.
- Cook until it starts to go golden round the edges. Don't rush it!
- You can have a sneak peak and check underneath by using a spatula to lift the edge. It should be golden brown; but the colour may be in patches.
- Shake the pan to loosen the pancake and then with one quick, sharp movement, flick it up into the air and if you're lucky you'll catch it too. It takes confidence, you can't do it half-heartedly. Commit and go for it!
- Or just use a spatula, that works too!
- It's ready once the other side is nice and golden.
- Serve with your choice of topping. Personally I don't think you can go wrong with sugar and a squeeze of lemon and I think they taste best eaten with your fingers, fresh from the pan. Yum!

I would never describe myself as being particularly green fingered or good in the garden. It's one of those things that I love the idea of - having my own country garden, full of fresh fruit and vegetables, herbs and flowers, all ready for picking. Reality is I like to enjoy it from a distance and get somebody else to do all the work!
I do however love growing tomatoes from seed, they're easy to do and I love watching them turn from these uninspiring looking pips into these spindly little shoots, all the way to climbing vines with big, ripe tomatoes hanging from them.
At least that's the intention. This year I wasn't quite so lucky...

Claire Wade
I'm an author, disability activist, winner of the Good Housekeeping First Novel Competition and The EABA for Fiction 2020 and founder of Authors with Disabilities and Chronic Illnesses (ADCI).
The Choice is available from:


DETAILS:
Title: The Choice
Publisher: Orion
ISBN: 1409187748
Title: The Choice
Publisher: Orion
ISBN: 1409187748
You can keep up to date with all my latest blog posts by signing up to my email newsletter.
 RSS Feed
